If you missed the first post, please find it here.
Assembling my cyclone
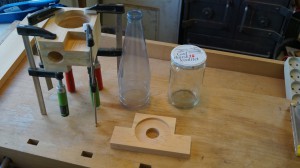
After milling and gluing the parts for my new cyclone I’m ready for assembling it. The plastic bottle is cut to the right length and I’ve milled a block that will fit both the bottleneck and the lid of a jar I’m planning to use for collecting the dust.

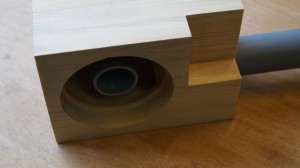
First I install the pipes in the top part of the cyclone. I’ve taken extra care to make every hole a snug fit so no glue is required. Both the vortex finder and the inlet pipe are 32 mm plastic pipes.

As you see in the photo there is a recess for the bottle itself (bottle not installed yet). Again it’s a precise fit so no glue is required.
Test run
Here is a short video of my test run:
I did some experimenting with the vortex finder length and the air flow while testing. Difficulties emptying the cone seemed to grow while testing – probably due to the seal between the bottleneck and the jar getting worse as I took it apart several times.
Furthermore, a lower air flow seemed to improve emptying the cone when no dust was added. I have no idea how much dust the vacuum cleaner actually took during the test but it seemed to be a lot. In the video it is easy to see a column of dust in the center of the cone indicating that the vacuum cleaner at least took some of the finer dust, which wasn’t supposed to happen…
I think I’ll make another test with two cyclones in parallel to keep the overall air flow up and to make the combined cyclone more effective. Back to the drawing board… 🙂